Cost-Effective DIY Ice Bath Setup
Key Takeaways
- DIY ice baths can be budget-friendly without compromising on quality.
- Essential components include a tub, ice molds, and a thermometer for precise temperature control.
- Utilize alternative materials and equipment for a more economical setup.
- Consider seasonal sales for bulk ice purchases or ice-making solutions.
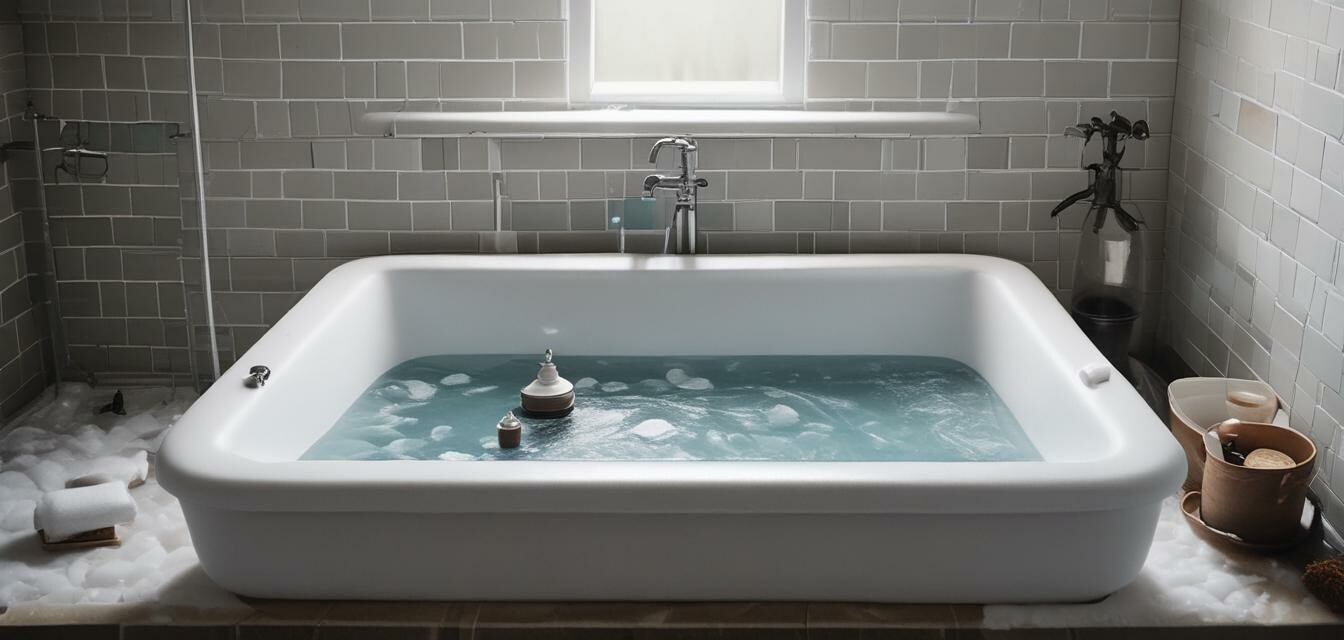
Setting up a DIY ice bath can be a rewarding experience, particularly for those looking to recover from intense workout sessions. A cost-effective approach allows enthusiasts to enjoy the benefits of ice baths without breaking the bank. This guide explores various components and tricks to create an efficient ice bath setup.
Why opt for a DIY ice bath?
A DIY ice bath is not only a budget-friendly solution but also customizable to fit your needs. Whether you're an athlete seeking recovery or someone looking to invigorate your routine, you can tailor your setup to your preferences.
Essential Components for Your Ice Bath Setup
| Component | Purpose | Cost-Effective Options |
|---|---|---|
| Ice Bath Tub | Holds water and ice | Use an inflatable pool or a rigid plastic tub |
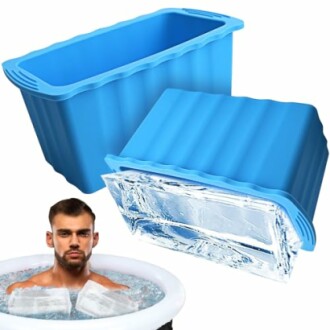
| Ice Molds | Creates ice for cooling | 2Pack Extra Large Ice Block Molds |
| Thermometer | Measures water temperature | Floating Pool Thermometer |
| Insulation | Retains coolness | Reflective blankets or bubble wrap |
Setting Up Your Ice Bath
To successfully set up your ice bath, follow these simple steps:
- Choose an appropriate location for your tub.
- If using an inflatable pool, inflate it and fill with water.
- Add ice created from ice molds to lower the water temperature.
- Use a thermometer to ensure the desired temperature is reached.
- Incorporate insulation to maintain the chill for longer periods.
Recommended Products for Your DIY Ice Bath
 Essential for cooling
2Pack Extra Large Ice Block Molds
Create large ice cubes that last longer, ensuring your ice bath stays cold for efficient recovery.
Learn More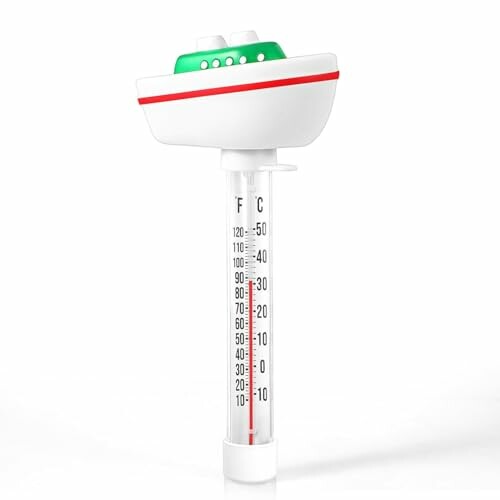 For accurate readings
Floating Pool Thermometer
This thermometer provides easy-to-read temperature readings for your ice bath in both Fahrenheit and Celsius.
Learn MoreTips for Maintaining Your Ice Bath
Beginners Tips
- Regularly check the temperature to ensure it's effective for cooling.
- Store leftover ice in a cooler to use for future baths.
- Clean your tub after every use to maintain hygiene.
- Consider using a timer to limit your exposure time during each bath.
Common Questions about DIY Ice Bath Setups
How often should I take an ice bath?
It's generally recommended to take ice baths after intense workouts or injuries, but it's essential to listen to your body and seek advice from a professional if uncertain.
Can I use regular ice instead of molds?
Yes, traditional ice can be used. However, using large ice blocks, like those created with molds, will keep your bath cool longer without frequent refills.
Conclusion
A well-planned DIY ice bath setup doesn't have to cost a fortune. By investing in essential components and using smart tricks along the way, you can create an effective cooling solution tailored to your recovery needs.
Pros
- Cost-effective alternative to commercial ice baths.
- Customizable to fit your specific needs.
- Portable options available for flexibility.
- Encourages regular use for recovery benefits.
Cons
- Initial setup may take time and effort.
- Requires ongoing maintenance and upkeep.
- May need a source for ice or cool water frequently.